
Busted Canvas: Create Stunning Wall Art with Ease
Key Takeaways
- A busted canvas is a DIY craft that looks torn open to reveal a hidden image or design underneath;
- You can make a busted canvas at home with simple supplies, yet it involves cutting, adhesives, and dry time;
- Mixtiles photo tiles recreate a similar reveal moment with clean installation, no tools, and easy repositioning;
- This guide covers a quick busted canvas tutorial, layout ideas, and how to choose between DIY and Mixtiles.
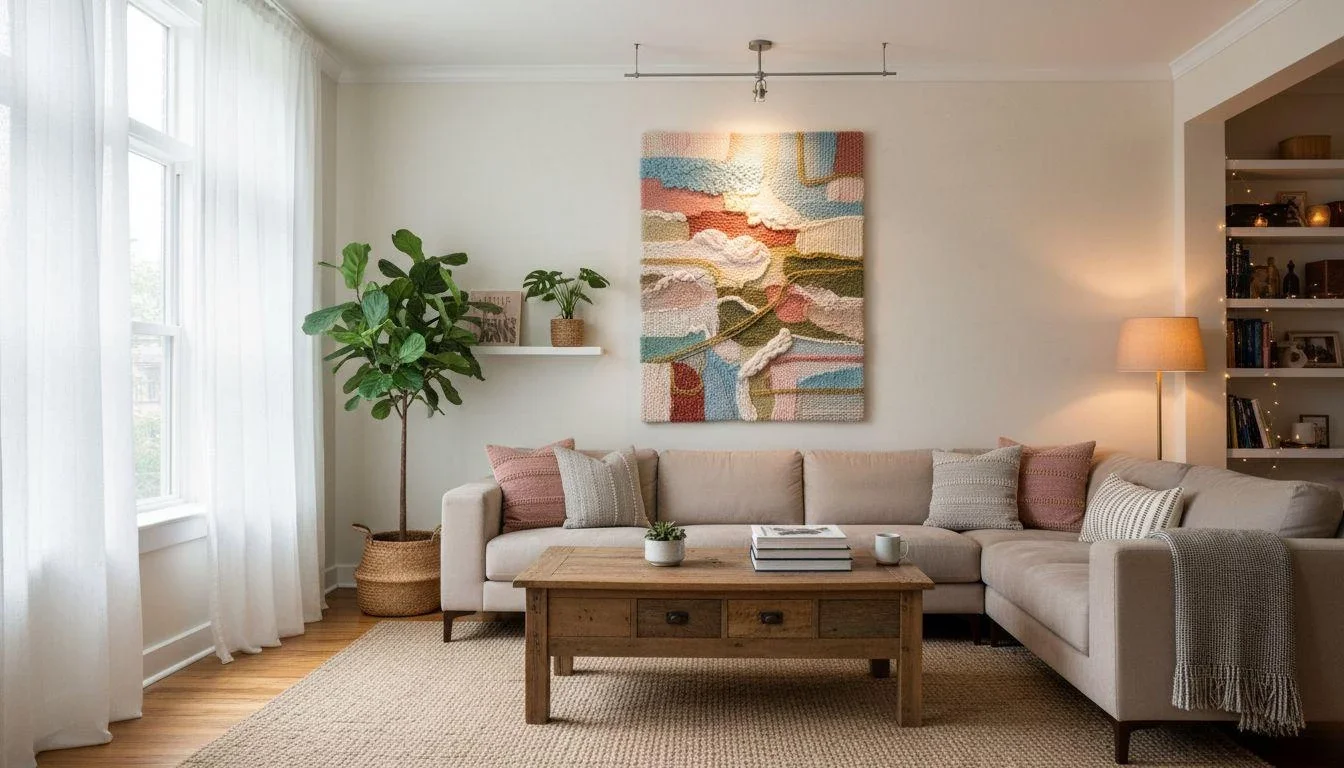
Busted canvas projects are everywhere, with curled edges that dramatize a hidden photo or festive image. If you love the look but not the mess, you are in the right place. Below, you will learn what a busted canvas is, how to make one quickly, and how to mirror that reveal effect with Mixtiles lightweight, adhesive, and repositionable photo tiles. Whether you want a hands-on canvas tutorial or a fast digital path to wall art, you will find an option that fits your space and style.
Ready to skip the mess? Create a stunning photo gallery wall in minutes. Upload your photos and see your wall arts come to life.
What is a busted canvas, and why is it trending?
A busted canvas is a craft technique where a canvas looks torn or curled back to reveal a second layer, often a printed photo or patterned paper. It is trending because the texture feels handmade, the reveal moment is playful, and the result works for holidays, kids rooms, and gifts. The look is bold, three dimensional, and easy to personalize.
How do you make a busted canvas at home?
You can make a busted canvas with a stretched canvas, a backing image, and adhesives: cut from the center, curl the flaps, then fix them in place. The process is easy, but you will handle blades, hot glue, and drying time, so plan for a protected surface and patience.
Tools and supplies checklist
Gather the basics before you start this busted canvas tutorial.
- Stretched Canvas and a backing panel or tray frame;
- Printed Image on photo paper or a favorite photo print;
- Craft Knife or scissors, hot glue or craft glue, Mod Podge or spray adhesive;
- Optional Embellishments, ribbon, paint, scrapbook or tissue paper.
Quick step-by-step
Follow these high level steps to make a busted canvas. Work slowly, and let it dry between adhesive stages.
- Prep the canvas: paint the surface if desired, then let it dry;
- Mount the image: adhere your photo to a backing board, smooth gently, and let it dry;
- Cut the top layer: flip the canvas, make careful cuts from center to edges, then turn it over;
- Curl and secure: roll back the flaps, fix with hot glue at the edges, add optional ribbon or paper accents.
Pros and cons
DIY is highly customizable and fun, and you can make a one of a kind piece with texture and mixed media. On the flip side, you will need tools and adhesives, there is some mess, and the result is permanent once assembled. Many crafters pick up supplies at a Dollar Tree, which keeps budgets in check.
Safety note: always cut on a self healing mat, keep hot glue away from fingers, and allow adhesives like Mod Podge to fully cure. If you can make time for each stage and let it dry, your results will look crisp and intentional.
Love the look but not the mess, can Mixtiles recreate that “reveal” moment?
Yes. With Mixtiles, you stage a reveal through layout to create a dynamic picture wall: place one hero photo at the center, then arrange surrounding tiles to act like curled edges. Tiles stick and restick, so you can move them until the composition feels right, no nails or glue required.
Easy layout ideas that mimic a busted canvas
Try these three simple arrangements to evoke the same drama.
- Spotlight Reveal: One central tile as the surprise, with four to eight tiles around it at playful angles;
- Ribbon Edge: Build a perimeter grid like a frame, then pop a vibrant image in the middle as the reveal;
- Seasonal Switch: Keep the outer grid fixed, swap the center tiles for Halloween, Christmas, or birthdays.
Open the Mixtiles app, upload your favorite photos, and arrange your picture tiles to mimic a busted canvas. Preview these layouts on your wall before you order.
Which photos and styles work best for a busted canvas look?
Choose a high contrast subject for the center, then support it with simpler images around it. Seasonal photos, kids art, or a bold pet portrait all create a memorable reveal moment.
Photo selection tips
Pick a crisp, high resolution image for the middle so details pop. For easy refreshes, prepare a few seasonal versions. If you love playful scenes, use a pet, a travel landmark, or a single flower macro for the hero photo, then complement it with textures or solids nearby.
Style pairings
Minimalist rooms benefit from monochrome tiles around a saturated color center. Cozy craftcore feels great with warm tones, wood textures, and close up family moments. For festive setups, keep outer tiles neutral so holiday swaps instantly stand out.
How do you hang and refine the final look, DIY canvas vs. Mixtiles?
DIY canvases usually hang with sawtooth hardware or damage free strips. Mixtiles include stick and restick mounting or a magnet system, so you peel, place, and adjust in seconds on painted walls, textured walls, or paneling.
|
Factor |
DIY Busted Canvas |
Mixtiles |
|---|---|---|
|
Setup Time |
About 60 to 90 minutes plus dry time; |
About 5 to 10 minutes to hang. |
|
Tools |
Knife, hot glue, Mod Podge, brushes; |
No tools, built in adhesive or magnets. |
|
Mess Level |
Cutting and adhesives; |
Clean install, no debris. |
|
Reposition |
Fixed once glued; |
Stick, restick, and micro adjust. |
|
Seasonal Refresh |
Make a new canvas; |
Swap center tiles in seconds. |
|
Wall Safety |
Depends on hardware and weight; |
Gentle on walls, designed to remove cleanly. |
DIY busted canvas hanging
Use a sawtooth hanger or damage free strips on a flat backed frame. Verify weight limits, press hardware firmly, and keep the display away from humidity. Level once, then avoid moving it, since glue and curled edges are delicate.
For a deeper walkthrough on hardware choices, spacing, and leveling, see our step-by-step guide on how to hang canvas art on a wall.
Mixtiles hanging
Wipe the wall, plan spacing on a table, then peel and place. If your tiles use magnets, apply the wall magnet first, then attach the tile magnet and adjust. If you need to nudge the spacing, lift gently and reapply until the reveal composition feels perfect.
Should you DIY a busted canvas or choose Mixtiles?
Choose DIY if you want a tactile, mixed media project. Choose Mixtiles if you want speed, flexibility, and a modern gallery finish that you can update for seasons or events.
Choose DIY busted canvas if:
You enjoy hands on crafting and personalization; you want curled edges and layered materials; you have time to cut, glue, and let it dry; you plan to keep a single display up long term without moving it.
Choose Mixtiles if:
You want a clean, fast setup with no tools; you plan to refresh the center image seasonally or for events; you prefer wall safe mounting that you can adjust at any time; you want options like framed, frameless, or beautiful custom canvas prints in multiple sizes.
As you research a busted canvas tutorial online, you might notice common blog boilerplate near comments. Phrases like “This site uses Akismet to reduce spam,” “your data is processed,” and buttons like “Cancel reply” or “Cancel” often appear, especially on DIY sites. That is normal for comment moderation, and not part of the craft. If you are sharing your results, credit the original canvas tutorial you followed, and add your own tips so others can make a busted design they love.
Conclusion: Busted canvas art creates a dramatic reveal. If you want that effect without blades or glue, Mixtiles lets you build a layered story with a central hero photo and flexible tiles you can move anytime. You can make a busted canvas from scratch, or you can create the same wow factor in minutes using Mixtiles.
Create your reveal-worthy wall now. Turn your favorite photos to canvas or design a layout you can rearrange anytime. Order today!
Frequently Asked Questions
How do I fix a sagging or damaged canvas?
Lightly mist the back with water, then warm gently with a hair dryer to tighten the fibers. For dents, place a clean cloth and heavy books on top for 24–48 hours. Small tears can be patched with canvas and gesso, sanded smooth, then repainted.
How do you make a busted‑out canvas effect?
Prep or paint your canvas, mount a photo to a backing board, then flip the canvas and cut an X from center to corners. Turn it over, curl the flaps outward, and hot‑glue them in place. Add ribbon or paper accents and let everything fully dry.
Can I buy canvases for this at Dollar Tree?
Yes. Many Dollar Tree stores carry small stretched canvases and canvas panels, plus glues, ribbon, and scrapbook paper. Selection varies by location and season, and online orders are often by the case. Check your local store or the website for current availability.
Can you use scrapbook paper or napkins for a busted canvas?
Yes—use thin scrapbook paper, tissue, or napkins. Avoid thick cardstock, which doesn’t curl well. If using napkins, separate the printed ply and adhere with decoupage glue, smoothing gently to prevent wrinkles. Once dry, seal lightly to protect the design.
Is there a no‑mess alternative to a busted canvas?
Absolutely. Mixtiles photo tiles can mimic the “reveal” by placing a hero tile in the center and arranging supporting tiles around it. They stick and restick without tools, so you can adjust the layout anytime—no blades, glue, or drying time required.
Be first to know — deals, news & decor ideas.
By clicking you agree to the Terms of Use & Privacy Policy